Uncategorized
Kiln Problems
When You Open a Kiln
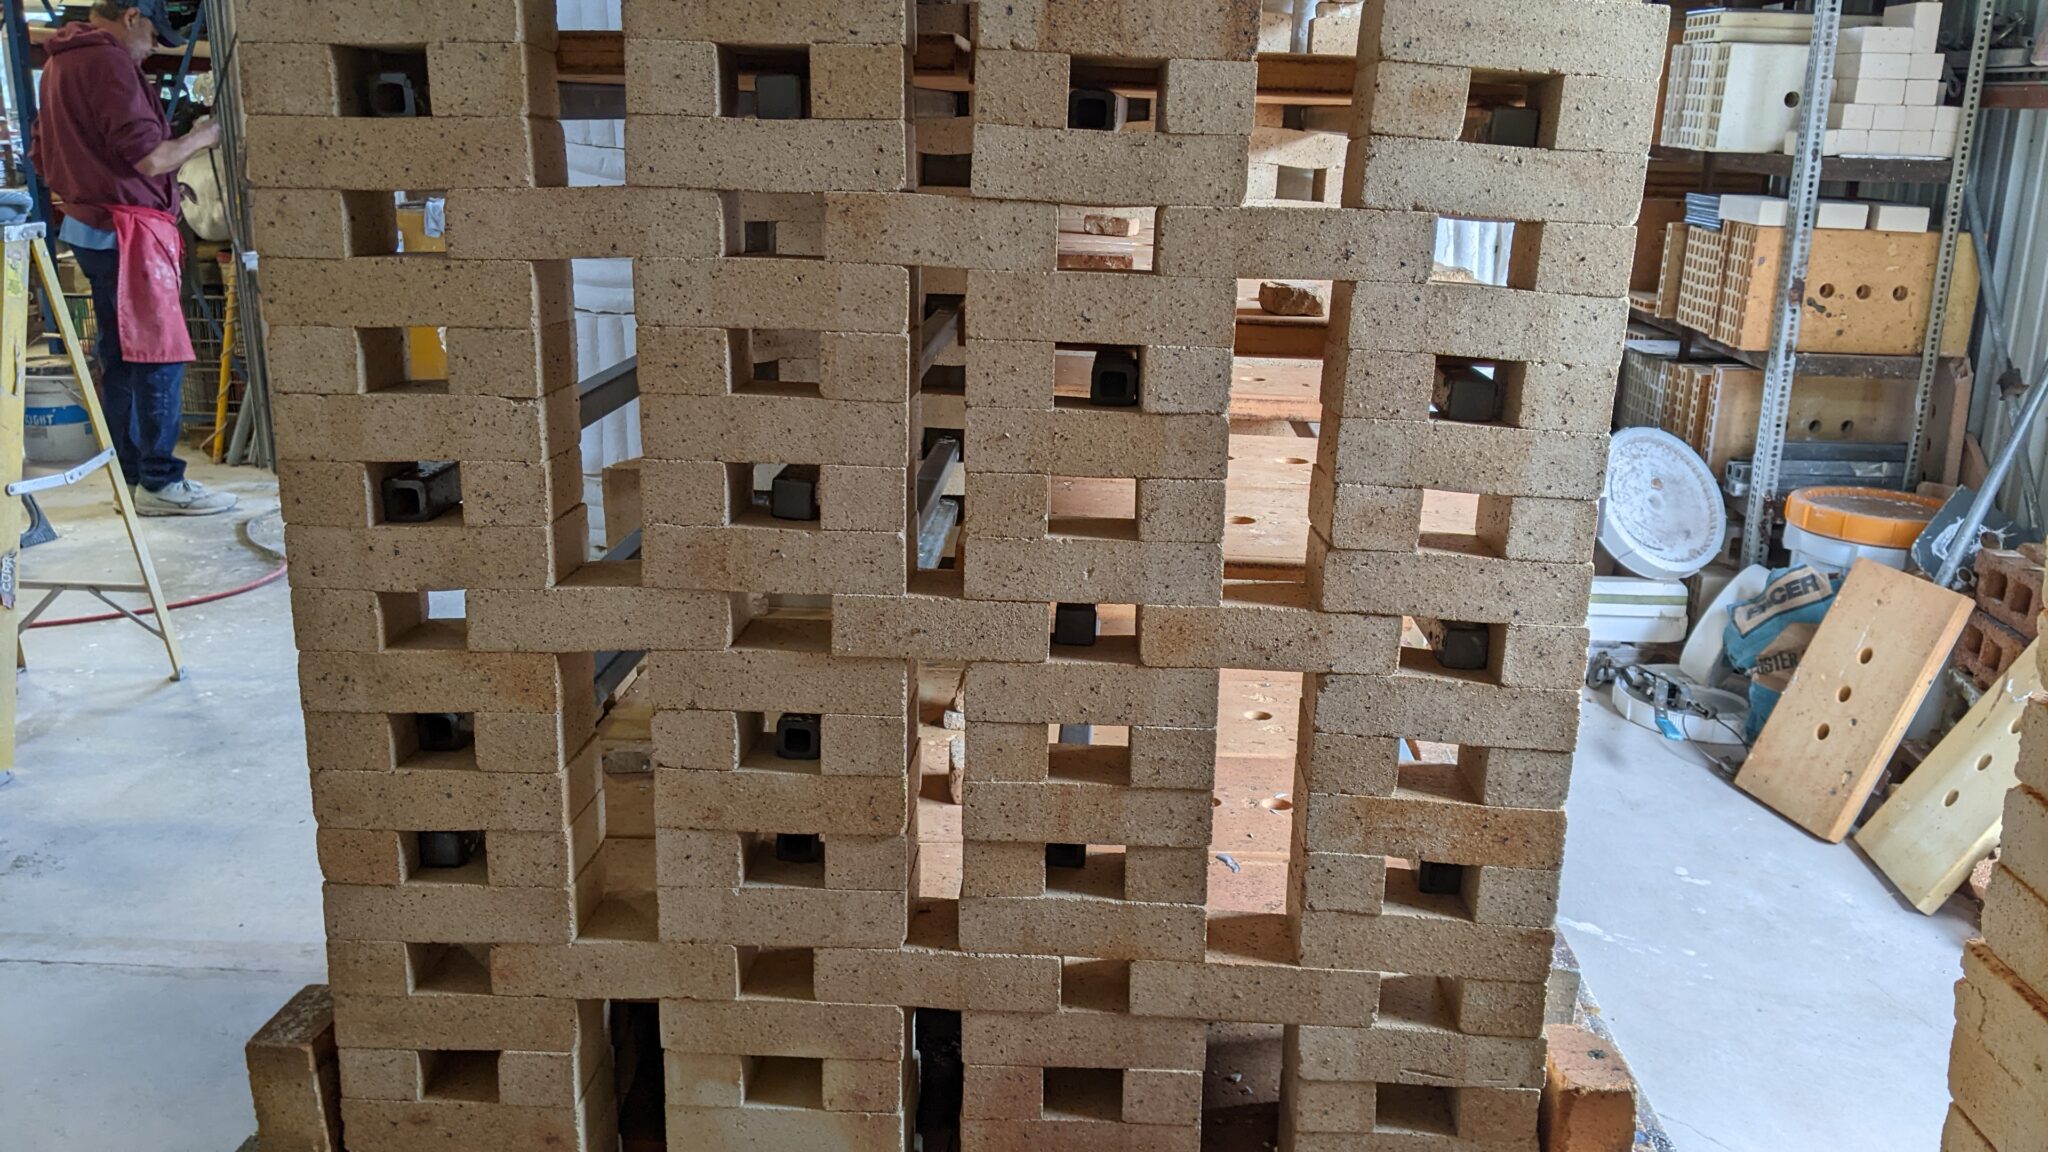
You never know exactly how the pottery is going to look after firing. But sometimes there is more reason to be anxious about the outcome. In the last few firings of 2021 we were having problems with the kiln walls that hold the beams that support the shelves. During the firing the wall was shifting and we were afraid that everything might collapse near the end of the firing. These walls were originally built in 2013 and had been through over 100 firings with an occasional adjustment, but the intense heat of nearly 2400 degrees takes a toll of degrading the brick.
Gilbert worked on the wall to stabilize it, but in the next firing the wall shifted again. I decided to buy new bricks to create the wall and rebuild it from scratch. I bought new fire bricks that I was told were good to 2700*. Gilbert set the brick and loaded the kiln for the next firing.
The wall at the back end of the kiln car.
The firing process.
I fired the kiln using two ways to measure the firing progress. For most of the firing I use a pyrometer that includes an oxyprobe. The pyrometer measures the temperature and the oxyprobe measures the amount of oxygen in the kiln. I fire in a fuel rich environment which alters the color and quality of the glazes that I use. This is the only way to achieve copper reds and many of the other colors that I prefer.
The second way that I measure the progress of the firing is with cones. I use a range of cones that are set so that they can be seen through peep holes. The cones are made to bend at different temperatures and give a more accurate reading of what is happening with the glazes near the end of the firing. Time and temperature affect the glaze melt, the longer the kiln is held at a temperature the lower the melting temperature of the glaze.
When you have made a change in how you set the kiln there is always a certain amount of anxiety in that first firing. Actually, there is more anxiety than usual but there is always some anxiety because you can never tell exactly what is happening inside the kiln during the firing.
We lit the kiln around 2:00 PM with two of the four burners set at a very low pressure. This is held for about five hours to dry out the pottery to keep it from exploding when the temperature is increased. Slowly the temperature is increased adding the two additional burners and increasing the gas pressure. At 10:00PM the gas pressure is set to allow the kiln to increase slowly overnight. At 6:00AM I turn up the gas and the temperature increases rapidly to the point where I set the kiln in reduction by making my final increase in gas pressure and adjusting the damper.
Loosing sight of the cones.
The firing proceeded without any problems until the final stages of the firing. Then the cones, I was depending on to tell me what was happening, began to slowly disappear from view. I could only imagine what was happening inside the kiln and I was imagining the worst. A complete collapse of the wall ruining a kiln load of pottery was my worst case scenario, but I wouldn’t know until the kiln was opened in two days.
The waiting game.
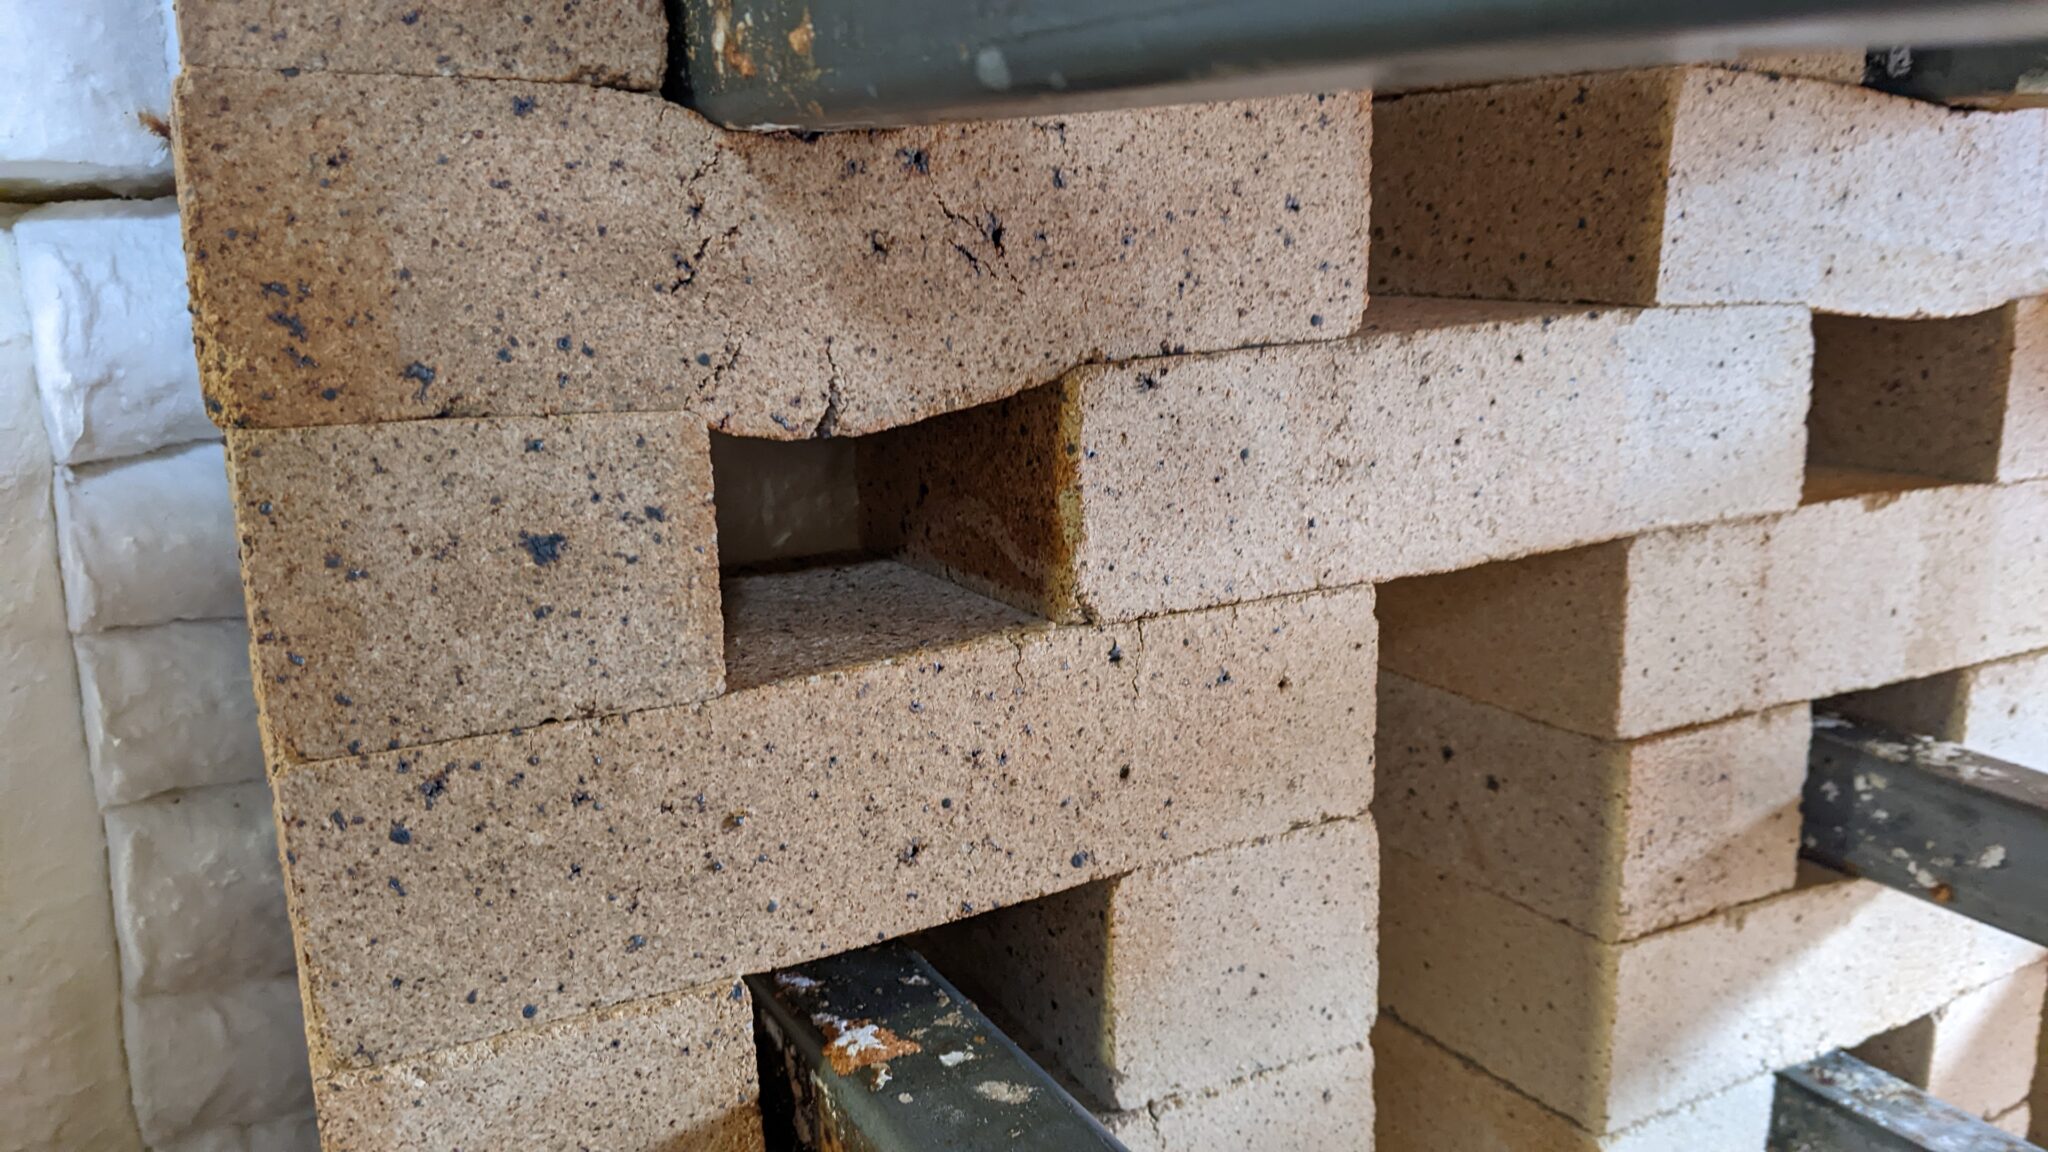
I waited anxiously during the next 48 hours. I slowly opened the kiln to discover the result. The total disaster that I imagined did not happen, but the new fire brick had not performed as specified. The brick wall shrank over three inches in height which explained the disappearing cones. the cones could no longer be seen through the peep holes because they were lower due to brick shrinkage. Many of the bricks fused together in the wall and some of the brick had begun to sag.
We had to start again to build a new brick wall for the kiln by finding a new source for the brick so the wall would withstand the temperature without bending or sagging.