Uncategorized
Making Pottery: Steps 10 and 11
Step 10: Cleaning Glaze off the bottom
Once a pot has been glazed and decorated, the bottom needs to be cleaned before it can be loaded in the kiln. This is done with a damp sponge much like wiping the kitchen counter. If the glaze is not cleaned on the bottom, it will melt in the firing causing the pot to stick to the kiln shelf. Chunks of the pot will then usually come off the bottom when the piece is removed from the kiln shelf, creating divots in the bottom of the pot and often razor-sharp pieces stuck to the shelf. There is a temptation to try and brush them off the shelf with your finger that must be resisted because you will cut yourself.
Step 11: Loading the Kiln
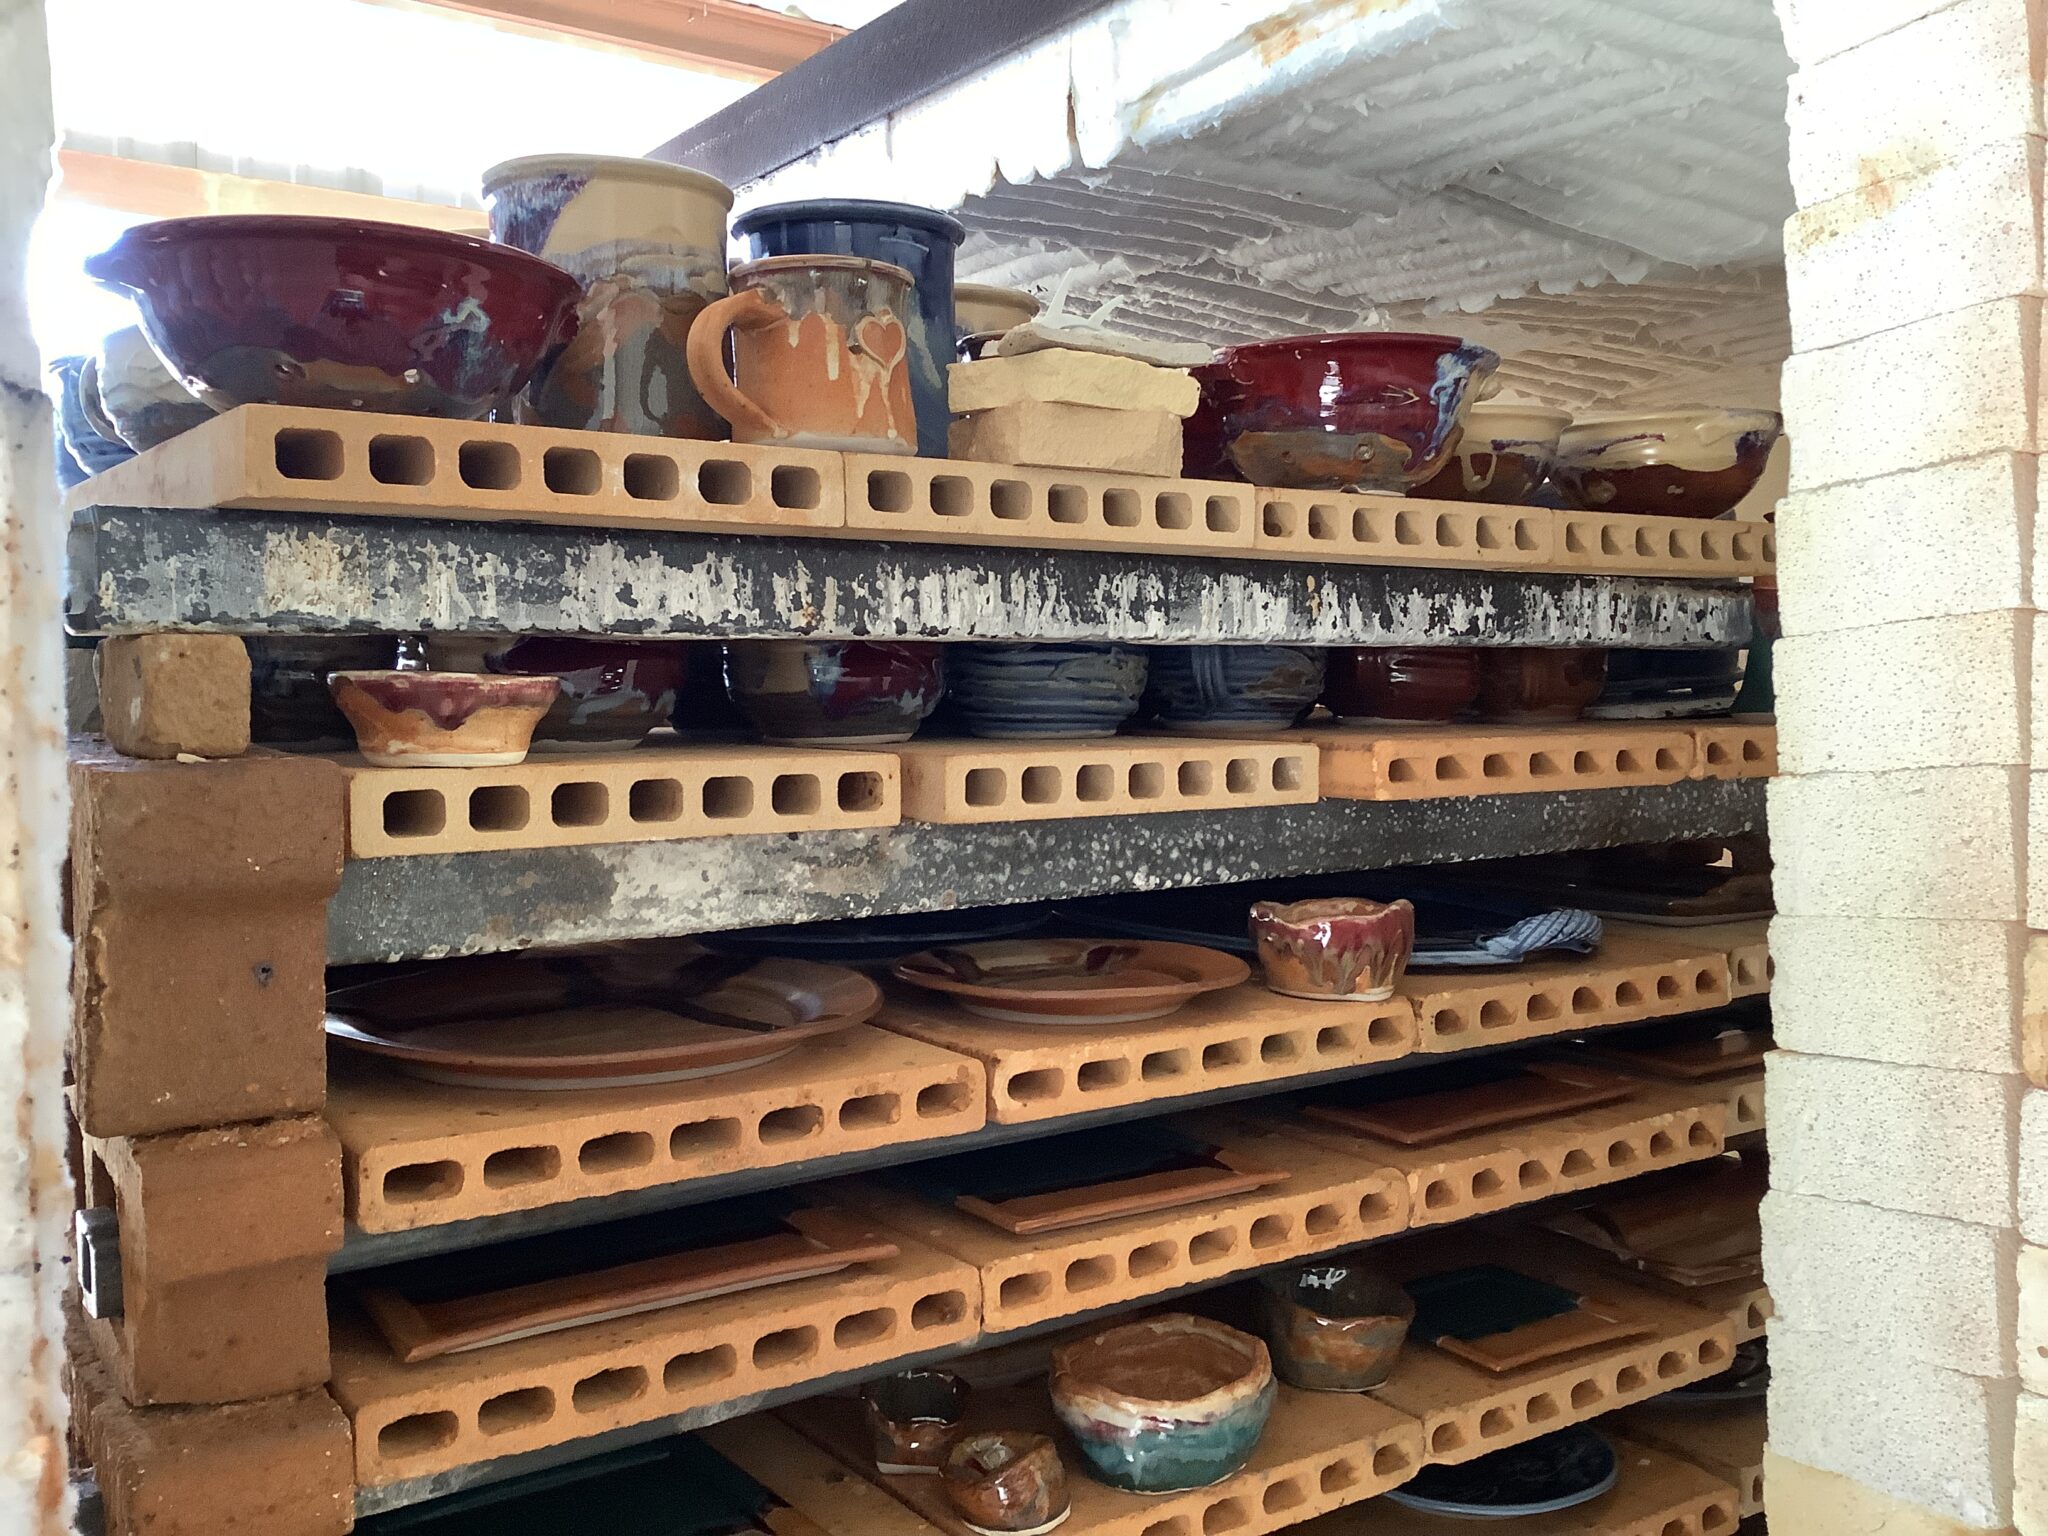
After any excess glaze has been cleaned off the bottom of the piece it is time to place the piece in the kiln to be fired. All of the preceding 10 steps that I have described are performed to 200 to 300 pieces over the course of a month. As many of those pieces as we can fit will be loaded into the kiln for a firing. My current kiln is 125 Cubic feet in size and, like all my kilns, with the exception of my first kiln, have been car kilns. The difference in this kiln is that the door on this kiln is part of the car. This means that the deck of the kiln rolls in and out of the kiln shell. This makes the kiln easier to load and unload. I built this kiln in 2013 when I moved from my warehouse studio to its location on Huntress. This kiln is 1/3 the size of my previous kiln and it is a downdraft kiln meaning that it has a chimney with the exit opening at the back-center bottom of the kiln. I used to produce a great deal more pottery than I do these days and I needed a larger kiln during that time. But when I moved to my current location, I anticipated slowing down my rate of production.
Delegation
Loading the kiln is a job that I hand off to my assistant Gilbert. He has worked for me for over 30 years and knows everything about making pottery with the exception of throwing on the wheel. He is an indispensable part of what happens in the studio.
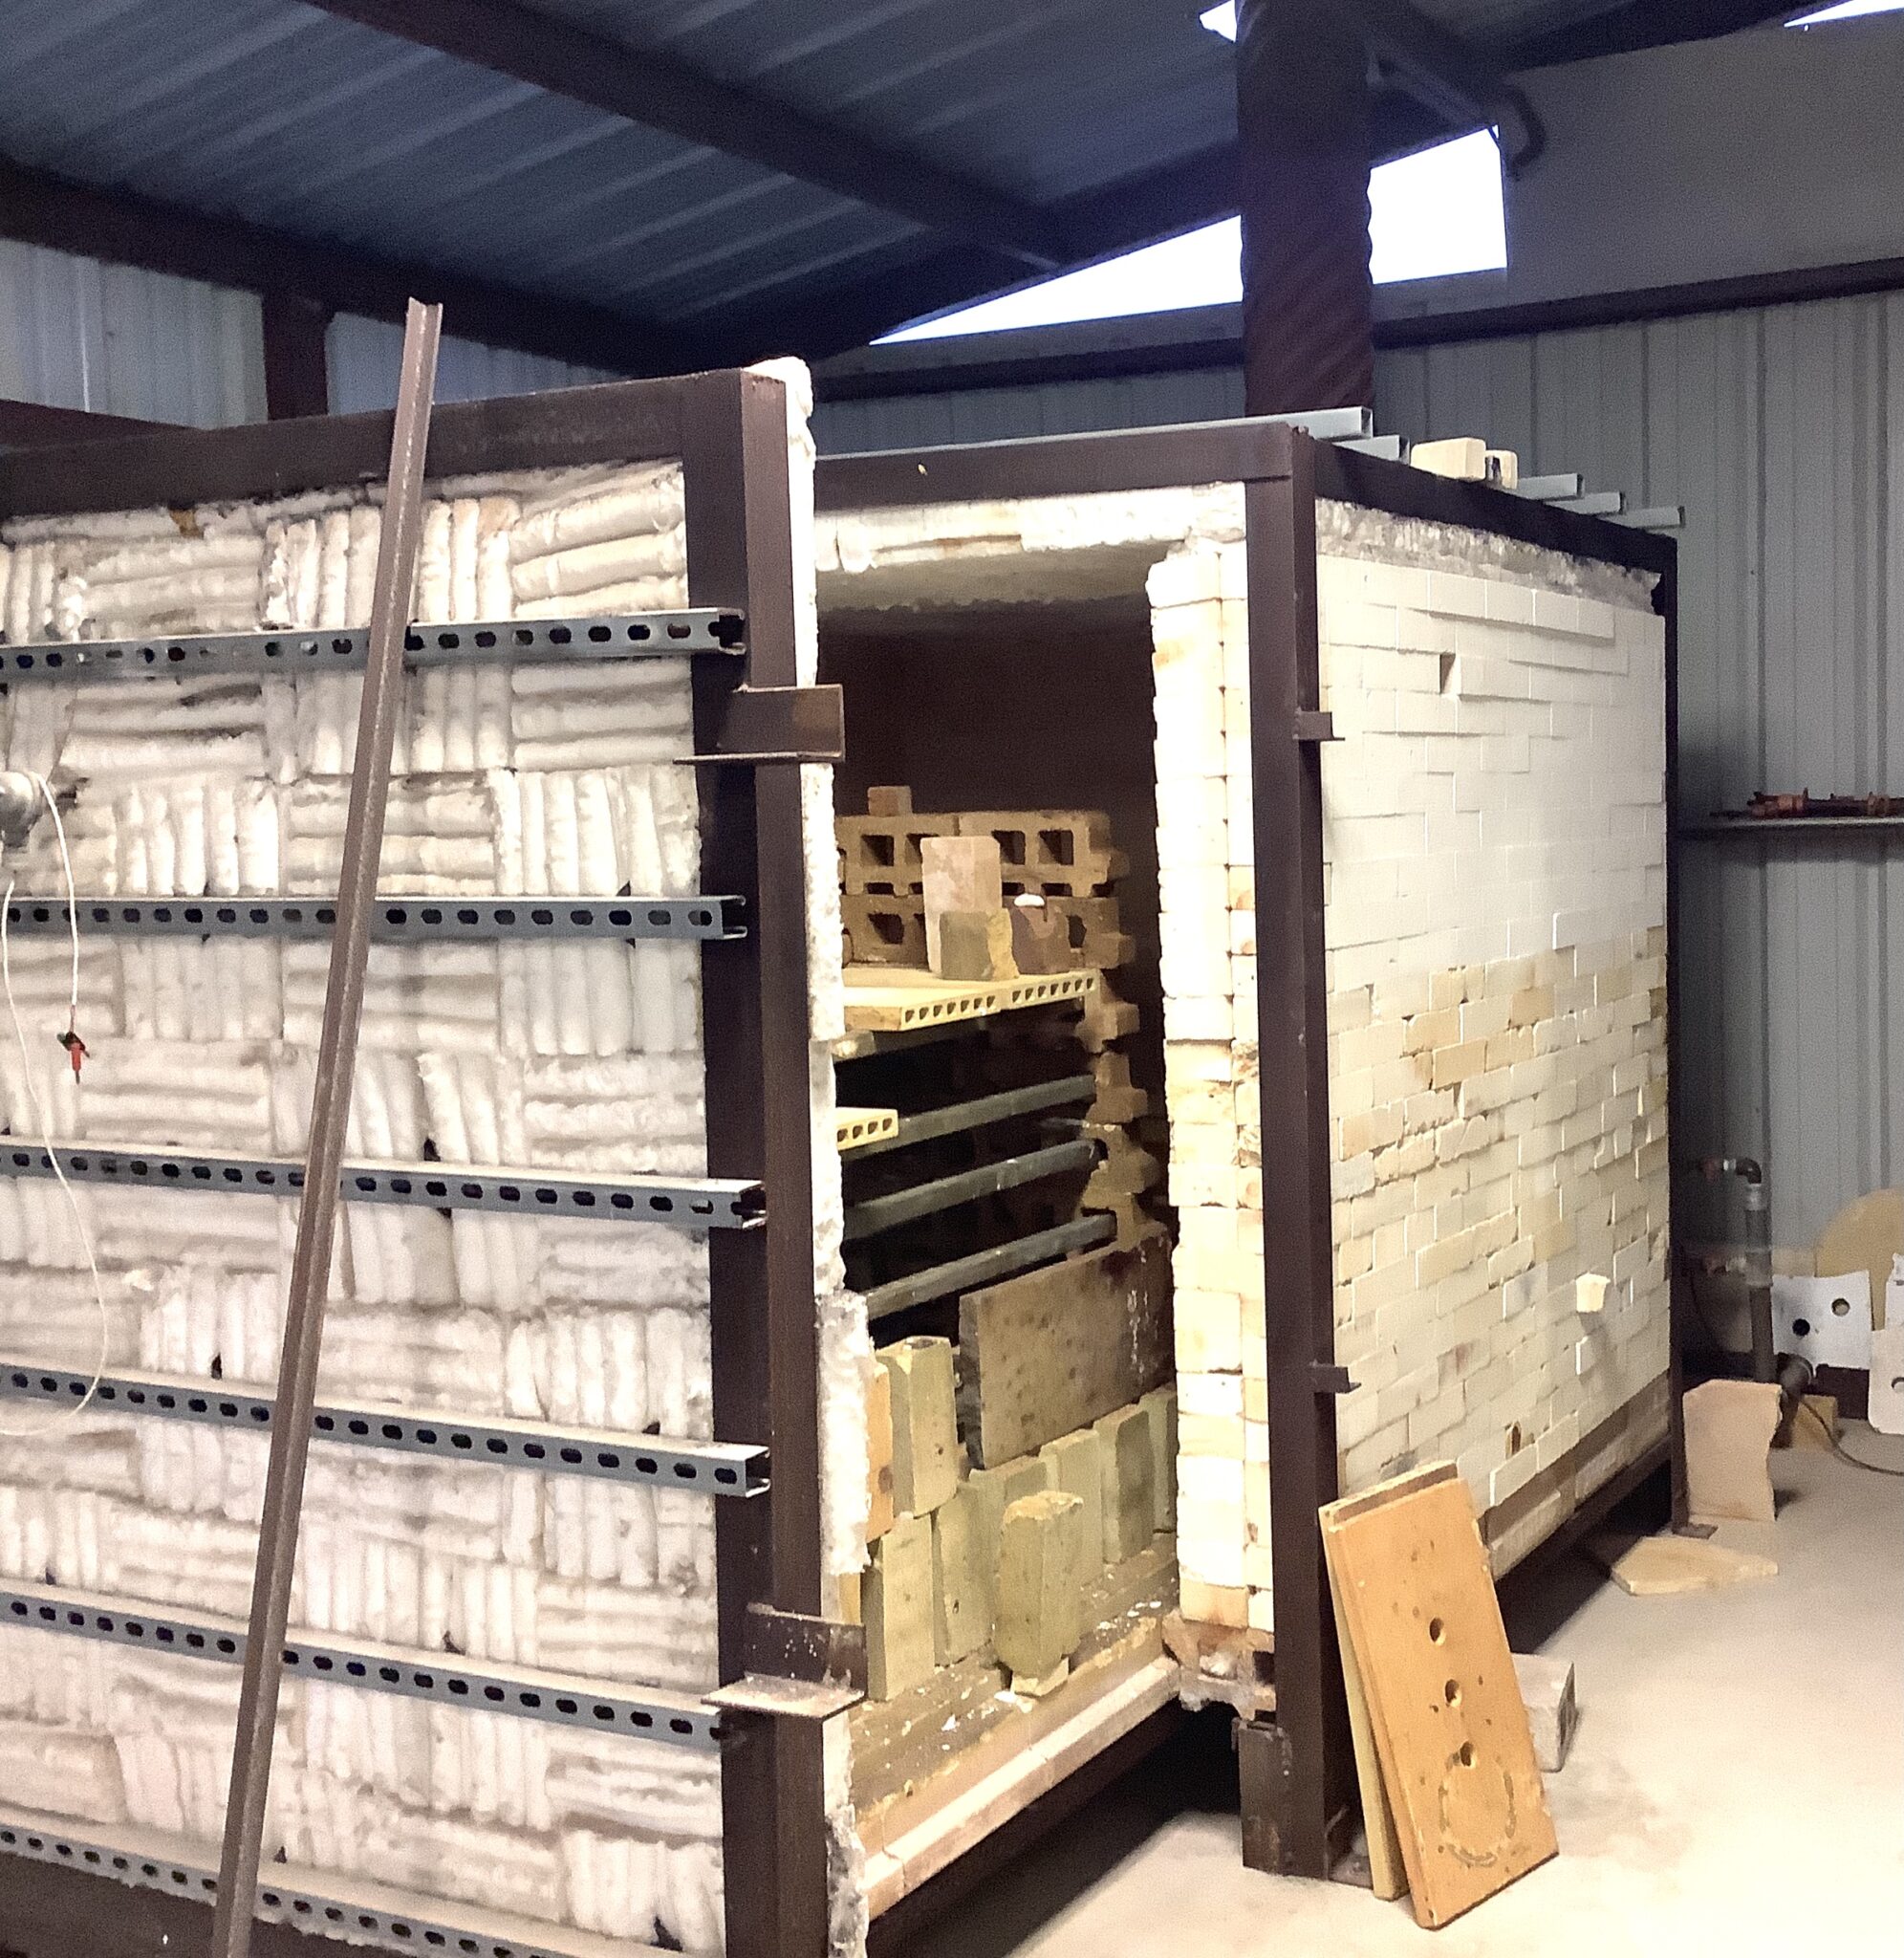
The kiln was designed to use nitride bonded silicon carbide tubes that span the length of the kiln car. At either end of the car there is a lattice work of brick that the tubes slide into. The kiln shelves are placed on the tubes and then pots are place on the shelves. The tubes will support 300 lbs. at 2400 degrees, but if dropped they will shatter like glass. They take up space, but it makes the kiln much easier and faster to load.